How to export LUTs in Adobe Premiere Pro?
A preferred tool for colorists is LUTs (Look Up Tables). As needed, they are simple to alter to meet a more precise profile and assist you in processing large amounts of video material simultaneously. LUT creation has been covered previously, but what if you want to export a LUT and utilize it elsewhere? So In this article, We are going to learn How to export LUTs in Adobe Premiere Pro.
Adobe Premiere Pro : Export Luts
The process of creating LUTs has already been explained, but what if you wish to use a LUT elsewhere after exporting it? In five minutes, we’ll show you how to finish it in Adobe Premiere.
Lumetri is the most popular method for doing this. Use the Effects panel to activate the effect or the Lumetri panel to access it, then change each setting to your preference.
After you have a look that you can use on additional clips, it’s time to export the LUT.
Export LUTs From Premiere
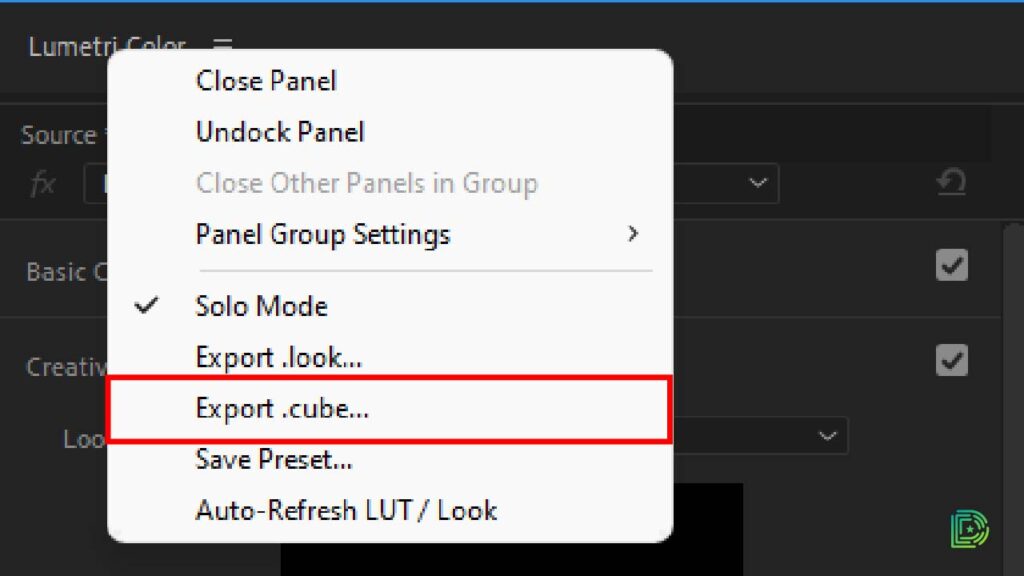
The option to export this LUT as a CUBE file may be found in the hamburger menu of the Lumetri panel.

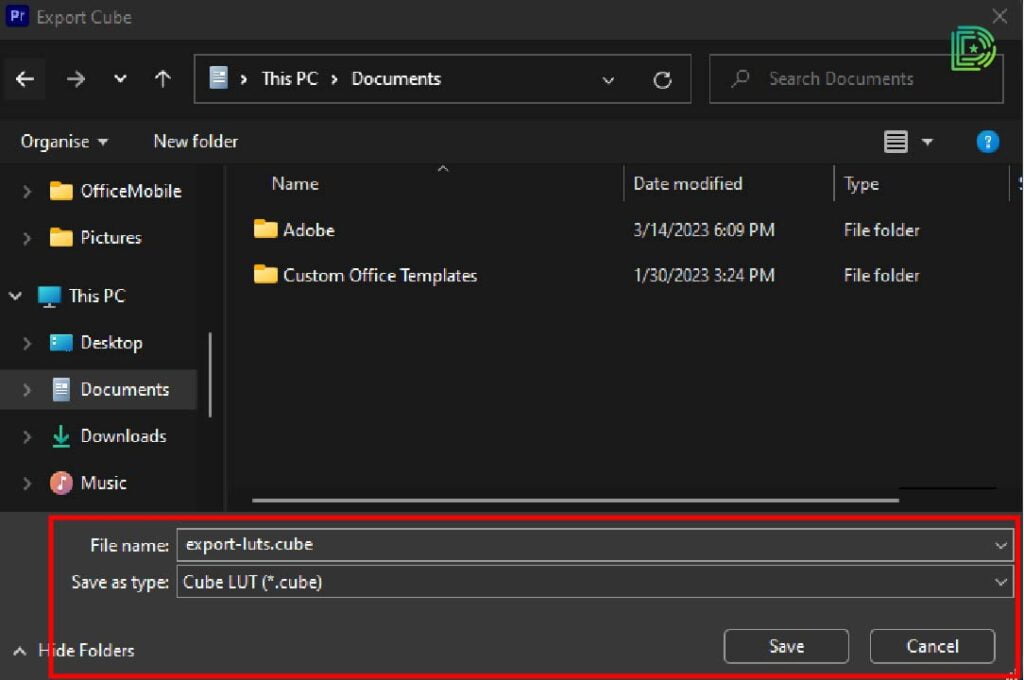
To export your LUT, pick a folder, give it a name, and do so.

Adobe Premiere Pro : Import Luts
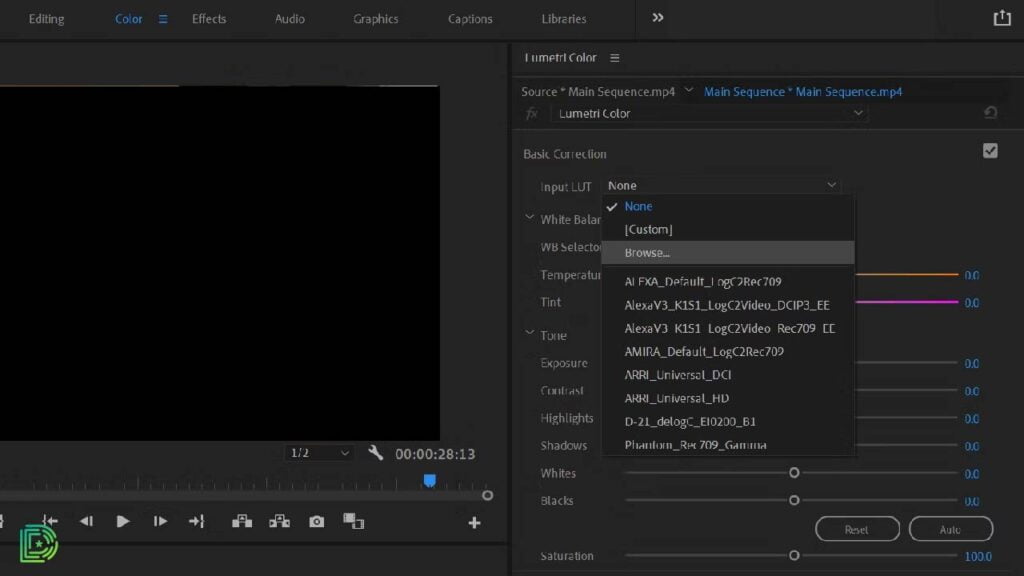
Import the LUT and include it in your sequence to apply it to a different clip. Expand the Input LUT dropdown on the Lumetri panel and choose Browse. Click Open after selecting your LUT from your file location.

You’ve done very little effort, as you can see, but things are already beginning to look a tiny bit better (if a tad too warm and too bold). You are now free to adjust the grade to fit the new clip. Already, you’ve economized a tremendous lot of time.
Conclusion
Spread your LUT if it tastes delicious like jelly. The quickest approach to grade large families of connected material, such as the several shots that make up a scene or even simply a collection of candid video clips all filmed on the same day and in the same area, is to export a LUT.
Eventually, you’ll be able to select from a large collection of LUTs while editing and color-grading video.


